 I travel with my bike… a lot. Well not as much as a professional cyclist. But for an everyday age-group athlete, it’s a lot of traveling with my bike. Most of the folks I talk to are petrified about damaging their bikes but I’ve had hardly any issues in the hundreds of thousands of miles that I’ve flown with my bike. Here is a quick review of how I do it.
No Travel Horror Stories
First off, traveling with your bike is pretty safe if you take reasonable precautions when traveling. Sure, you’ll hear stories about bikes getting beaten up by the airlines but you also hear stories about planes crashing. I have a friend who hasn’t flown since 9/11 because he’s convinced his plane is the next one to be hijacked. If you’re like my friend, don’t travel with your bike. Instead, save your money for some counseling to get past your phobias. The reality is that bike bags/boxes are treated relatively well simply because of their odd shape and size. Unlike suitcases, they don’t have a nice small rectangular shape so you just can’t stack much on top of them without the whole pile crashing down. Sure they can fall off a conveyor belt from 10 feet above ground– but those events are a rarity and even the best protection in the world might not help you in that instance. I personally think that your chances of wrecking your frameset are a lot greater each time you hop onboard to ride your bike in the first place.
What’s Reasonable Protection: What Bag(s) Do I Use
Just about every bag or box on the market these days offers a reasonable degree of protection, provided that they are well-padded with foam. In my opinion, a hard shell simply isn’t necessary and, without internal padding, offers less protection than a padded soft shell case. If you don’t believe me, take a look at Ray Maker, over at the DC Rainmaker site. He travels a TON of miles and takes his (very nice) Cervelo P3 everywhere around the globe. All of that travel is done with a regular soft case that’s basically identical to mine. He doesn’t even take off his rear derailleur (which I always do).
With that said, I think the choice of bike bags/boxes comes down to convenience. Convenience has two varieties– convenience during travel versus convenience during storage. For instance, the Bike Box Alan is a great case while you’re rolling through smooth floors on the airport but it’s a bit less convenient if you have to carry the box. And storing the box is a nightmare (granted, EVERY hard case is a nightmare to store). Because I don’t have a ton of space in my tiny Seattle townhouse, I need a soft case that rolls into something no bigger than a set of golf clubs. I also don’t want my bike case taking up a ton of space in my tiny hotel room. So with those restrictions in mind, I have two cases that I use for different kinds of travel.
 Pika Packwork EEP.

The Pika Packworks EEP is an awesome case. It has just enough padding to protect it from the insults of airline travel and is probably the smallest case you can get without taking off your fork. You can also put on the shoulder strap and carry it, which you wouldn’t want to do with most cases. In the picture on the left, I have my grey soft suitcase and the Pika EEP all set to go to the airport– not bad for a business trip with a full bike and indoor trainer! It’s also a nice bag because it doesn’t scream “there’s a bike in here!” This means that I frequently get away without paying the annoying bike handling surcharges.
If you’re thinking about the Pika, here are a few caveats. Most importantly, it doesn’t come with wheels. You can get them if you contact Pika directly but it’s not something that they advertise. You can also add them afterwards, which I did. Wheels are handy, particularly for international races. Hauling my bicycle through the train station of Switzerland was really a chore and convinced me that a set of wheels would be handy. Even if you get wheels added, however, the bag still hangs a touch low and rubs on the ground. So do yourself a favor and get the wheels for your Pika.
 Biknd Helium Case
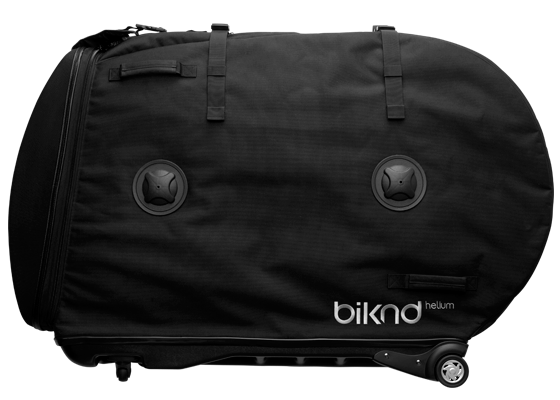
My other case is a Biknd Helium Case, which is equally amazing. I use this case if I’m going on a longer trip or one where I know that I won’t be hauling my case on cobblestone roads, up and down stairs, etc. There are three really neat features about this case compared to the Pika. First, it rolls beautifully. This is fantastic if you are traveling in modern cities and don’t have to take different forms of transit. Second, it store two pairs of wheels– in fact, I think it protects better with four wheels in the bag instead of two. This means that you don’t have to risk your expensive and delicate wheels as you’re training for your race. Third, it has airbags! These inflate and cover the entire side of the bike frame, providing an awesome degree of protection that I think is better than any hard case.
But, as I said, it’s a case for the right conditions. I once had to haul a Helium case through France and it was quite a chore– in fact, it was enough to convince me to pick up a Pika bag. But when I went to duathlon nationals in St. Paul with a frozen shoulder, it was the perfect choice.
 Ruster Hen House

I always look enviously at the Ruster Hen House when I’m at big races. It’s positively TINY compared to other bags, including my Pika. You do have to take the extra step of popping out your fork, but that’s a really simple thing to go. Folks who travel with the hen house tell me that they never pay oversized baggage fees– and some will even take out a tape measure and prove to the airline officials that their bike isn’t oversized. But that comes with a downside– your wheels have to go in a separate bag. So that means a minimum of two checked bags (usually three with your gear bag) and that starts incurring other baggage fees. Plus, carry three big pieces of luggage is obviously more cumbersome than carrying two. The folks I’ve noticed who do best with the Hen House are the minimalists– the folks who can put all their travel and race gear into a carry-on backpack. I wish I could do that. Instead, I’m a nervous packrat.
When I see the Hen House, I just wish they had a variant that was just a touch taller and wider to fit the wheels into the bag. The revolutionary space saving feature of the Hen House is the removal of the fork. If they developed a case that used that same principle, it could probably save a bunch of space over other bags.
BTW, there are currently two Hen House models. In addition to the original Hen House, there is the newer armored Hen House, which adds a layer of extra protection and (more importantly), a set of wheels. I’d go with the wheels.
How I Pack the Bag
The basics of packing a bike isn’t a mystery. Remove the handlebars, wheels, seatpost, and pedals. Pop the frame into the case. Remove the skewers and put the wheels in the case. Throw the skewers, pedals, and other small stuff in a nylon bag and pop those in the case. Then cram as much other stuff in the (cavernous) case, like shoes, helmets, floor pump, etc.
Beyond the basics, there are some finer points to bike packing that can really make a difference. Here’s my list of tips for bike travel.
- Pack a Portable Torque Wrench. Almost every bolt that you will likely be loosening on your bike will be either a 4mm or 5mm bolt (except pedals). Your stem/handlebar and seatpost bolts obviously need to be tightened properly. What’s worse is that it is very easy to strip these bolts and potentially ruin your frameset. Seriously, if you over tighten these bolts in a titanium or carbon frameset, they fail without warning and completely strip out. It’s really easy to avoid. Just write down the torque specifications at each location (usually marked in newton meters on “Nm”). In all likelihood, you’ll be able to get away with an inexpensive preset torque wrench plus a set of metric bits from the hardware store.
- Watch Weight Limits. While there is a natural tendency to want to fill the (enormous) space inside your bag with everything under the sun, be careful. Airlines have different weight limits and it is easy to bump up against these weight limits. On more than one occasion, I’ve seen a cyclist at the airport scramble at baggage checkin repacking their bags to fit weight limits while fellow angry passengers look on impatiently. Don’t be that guy.
- Be Careful About CO2 Cartridges. CO2 inflator cartridges are pressurized air cylinders and thus a real no-no onboard airplanes. Realistically, the risk presented by these cartridges is pretty minimal and hundreds probably slip past detection every day on planes. Nevertheless, you want to remove them from your bag.
- Pack Disposable Rubber Gloves and Lava Soap. Packing a bag is messy business. Do yourself a favor and keep a Ziploc bag full of disposable rubber gloves and some Lava soap in your bike case. This will work a lot better than those tiny little bars of soap in your hotel room for cleaning up your greasy mess.
- Store a Dedicated Toolkit in Your Bike Case. I keep a nylon case with a set of tools dedicated just for bike travel in my bike case. This makes it a lot easier than fumbling around at the last minute looking for tools to take on my trip and ensures that I didn’t forget anything. My kit includes my torque wrench, a set of bits, a pedal wrench, and a large bike multi-tool (the kind you put in your flat kit). I also have a set of chain link removal tools (see below).
- Remove Your Rear Derailleur and (Preferably) Your Chain. While Ray Maker doesn’t remove his rear derailleur, I always do. It seems like the one part of a bike that’s liable to get bent pretty easily. Plus, it’s super-easy to remove it. If you have ever packed a bike, you’ll know that the chain is a dirty mess. If you have a removable link in your chain, I highly recommend adding a chain link opener and closer to your toolkit as removing your chain just makes the process a lot cleaner and civilized. Then you pop your chain in a Ziploc bag and prevent it from getting greasy junk all over the inside of your expensive bike case. If you have electronic shifting, you can take the additional step of unplugging your rear derailleur and tossing that in a Ziploc bag as well.
- Traveling with a Disk Wheel. Disk wheels are notoriously fragile because, in place of spokes, they are made of a (very) thin carbon fiber skin over a foam core. It is extremely easy to dent or punch a hole in one by accident. To get around this problem, I cut two disks of 1/4″ plywood and then used a hole saw to make room for the cassette. It works beautifully for protecting my disk while traveling but adds a lot to the weight of the bag. If I had to do it over again, I would use a sheet of Coroplast (think corrugated plastic sheeting), which you get cut at places like Tap Plastics. I’ve used it in a number of applications and it is super-tough but still very lightweight.
Thanks for reading and be sure to like the Athletic Time Machine Facebook page and follow us on Twitter @AthTimeMachine. If you found this post useful, please reblog it on WordPress, share it on Facebook, or retweet it on Twitter to share it with your friends.
