 Yesterday, I opened up my mailbox and saw a lovely sight. It may not look that spectacular to you, but for me it represents nascent perfection, a diamond in the rough. It is a new tool for awesome athletic performance in 2015. This, my friends, is a BSX Insight Blood Lactate Monitor!
Preliminaries: Why Should I Care About Lactate Threshold and What’s So Special About the BSX Insight?
In an earlier post, I blogged about polarized training and my belief that many athletes train too hard and don’t give themselves enough recovery. Specifically, too many athletes train everyday close enough to lactate threshold but not enough to stimulate its development. This leaves them with lots of fast workouts in their training diaries that leaves them slow and injured on race day. But this isn’t to suggest that lactate threshold isn’t important– in fact, no matter what training philosophy you follow, lactate threshold is still considered the single most important predictor of race performance in races lasting between 15 minutes to 2 hours. It’s an incredibly important number to know– you just have to know how to use it in training and racing.
A lactate threshold test measures lactate accumulation in your body. Specifically, it looks to a find that pace/power/heart rate where you accumulate lactate faster than you can get rid of it. In most people– but not all people– that point comes at a lactate concentration of about 4 mmol/liter. While that might seem like a geeky and useless piece of data, it isn’t– it marks an inflection point at which lactate (and associated by-products like H+ ions) accumulate at too rapid a rate for your body to process them. In other words, once you go above lactate threshold, you’re on borrowed time. And sports physiologists generally agree that that borrowed time is about an hour long. A related test is the FTP (functional threshold power) test that seeks to measure the same thing– except based on how much speed/power you can sustain for either a 20- or a 30-minute test. It is an extremely “functional” test as it reveals how much your body (and your mind) are willing to tolerate. For this reason, some people claim that FTP is a more useful number to know. I disagree with those who minimize the importance of lactate threshold to FTP because training is– first and foremost– about training the body’s systems for improved performance. I’ll talk to my therapist about the mind part.
FTP testing is really hard to do right (for me at least). I’ll admit up front that I suck at FTP testing. I always tend to “overthink” the test because it forces me to think about how many watts I can sustain over 20-30 minutes. At least 50% of the time, I go out too slow or too easy. I always end with the feeling that better pacing would have yielded a better result. To prevent this, I now do FTP testing with a computer that gently ramps me up to the perfect average wattage for 16 minutes (based on my last test) and then lets me blast up a simulated hill for the last four minutes to fully empty the tank. But, no matter how you do it, an FTP test is super-uncomfortable and generally hated by even pain-loving professional athletes. No one wants to hear, “ride as hard as you possibly can for 20-30 minutes” unless it’s at the start of a race.
 By contrast, a lactate threshold test is a much simpler affair. There is very little for my brain to do. Instead, I just ride a bike or run or a treadmill at gradually harder 3-minute increments until I find an increment that I can’t complete. The first part of the test is also easy– it doesn’t get painful until the very end. I’ll take shorter, intense pain (lactate threshold test) over long, continuous pain (FTP test) any day. That means that I’m also much more likely to actual do the testing (don’t laugh– I know people on my team who are still relying on FTP tests from two years ago because they don’t want to repeat the experience).
Great– finding your lactate threshold is really good information. So why is the BSX Insight such a great device for measuring it? The reason is that blood lactate testing is expensive (about $200 and up) and requires a good deal of experience and cleanliness. I actually bought a lactate meter about 15 years ago and would prick my fingertip and bleed (yes, there’s blood involved) as precisely as I could onto a test strip and fed it into a small handheld (and expensive) reader. The samples can’t have sweat in them and have to be clean– plus they have to be of the right size or the optical reader can get confused. You can imagine how inaccurate this can get when you are trying to do it to yourself on the side of a track on a hot summer day while you’re still gasping for air after a hard interval run. Again, if you’re doing it in a clean lab setting with an experienced assistant, that’s one thing– but most of us don’t have access to such resources.
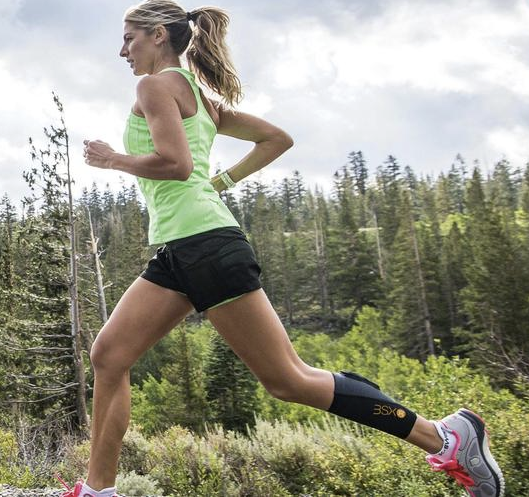 Now contrast that experience with using a BSX Insight. With the BSX, you simply put the pod in a compression sleeve on your calf and run (or ride). No pin pricks. No blood. Just data. It does it all using a near infrared LED, a special sensor, and even more special software. And because there are less variables involved, it’s far more accurate and consistent.
Enough time on the soapbox. Now that you know that you want/need this device that you didn’t know you wanted/needed only a few minutes ago, let’s get back to the review.
Unboxing
A few months ago, I blogged about the importance of lactate threshold and how I had supported a Kickstarter campaign for BSX Insight. After weeks of following their blog and checking their Facebook page, I finally got a notice that my lactate monitor was on its way. I followed it all weekend as it made it’s way through the USPS system from Houston to my mailbox in Seattle– and it arrived on a gray cool afternoon.
 Inside the box was a nice note from Dustin Freckleton, the president of BSX Athletics and a handwritten scribble showing that my unit was the 58th unit to roll off their production line. Wow, talk about getting in on the ground floor!
Setting Up
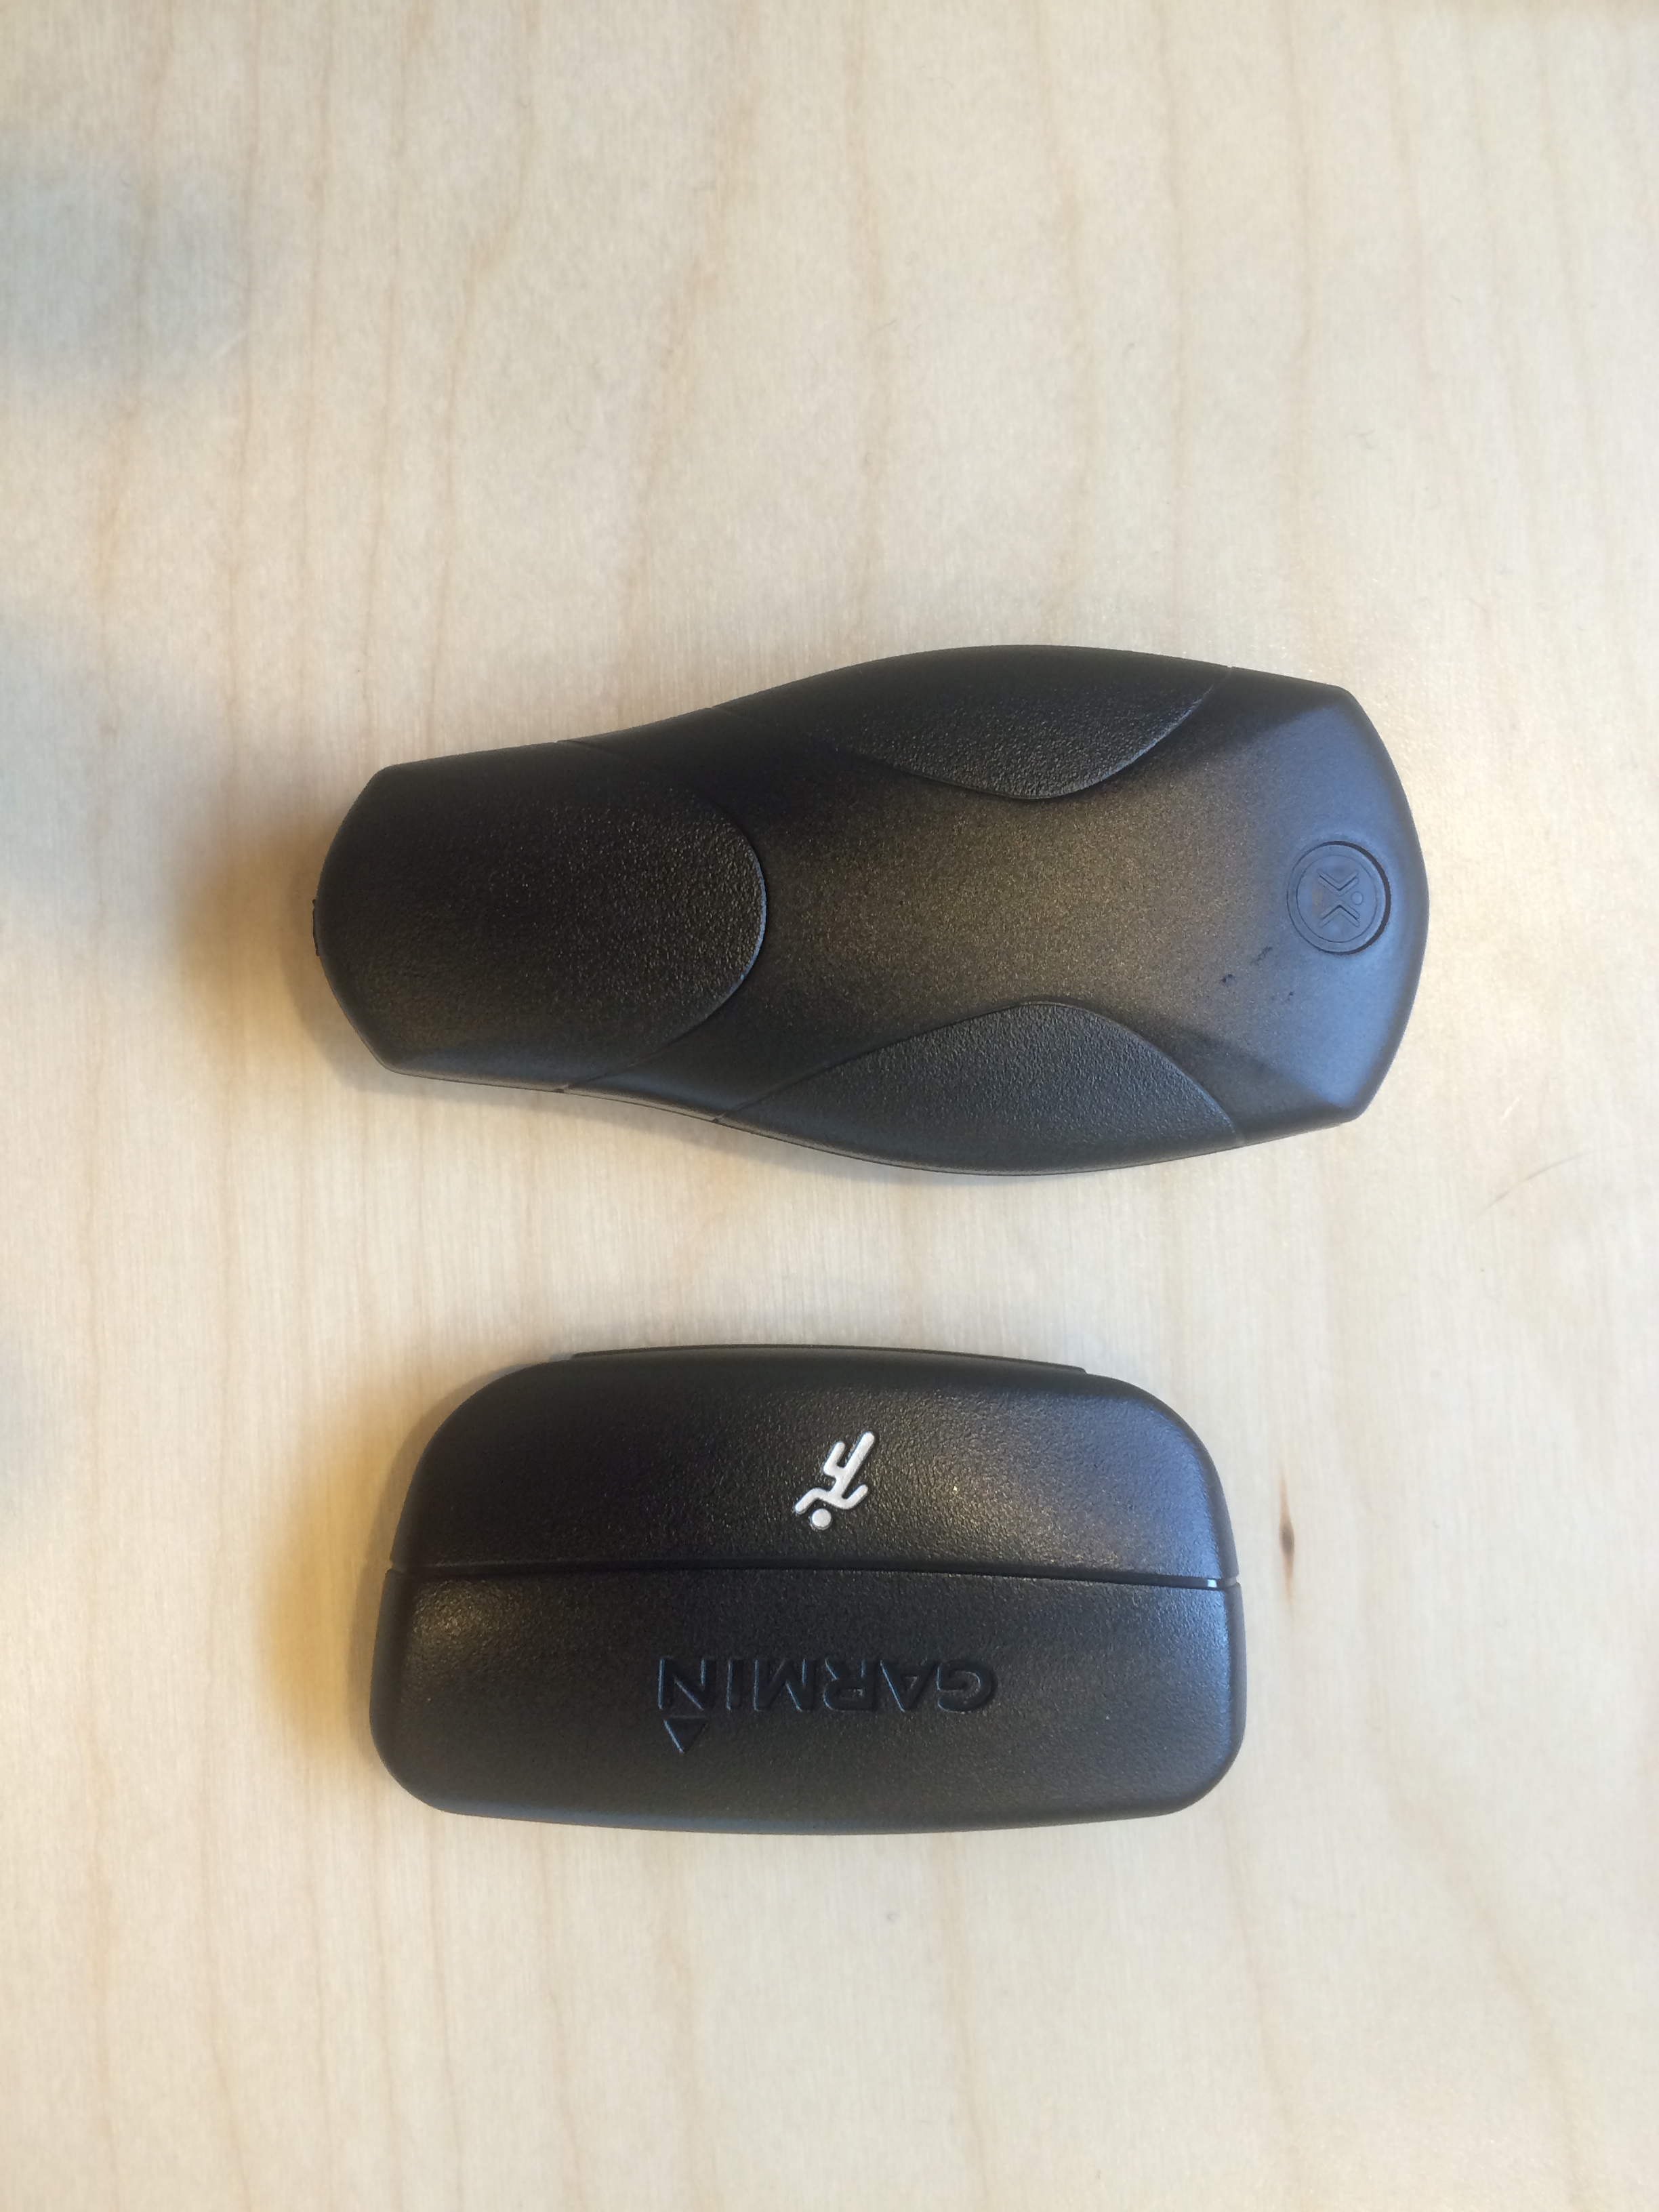
First things first. Once I opened the really nice packaging, I pulled out the monitor and charging stand and connected it to my Mac to fully charge. I was really struck by how small the monitor is– it’s maybe 50% longer and thicker than a Garmin heart rate monitor pod. One thing I learned pretty quickly: don’t be overly gingerly putting the monitor on the stand or it won’t charge– it has to sit all the way down in the stand or the blue light won’t flash. When it’s charging, the blue light (note: it’s not a button– don’t try to press it) flashes but becomes a steady blue when it is fully charged. At that point, you can take it out and use it– the unit will automatically shut off and turn on as needed.
Here are some thumbnails showing the setup of the BSX Insight– feel free to click on any of the images for more detail.
|
|
|
|


Charging takes a few hours, which gives you enough time to read the amazing Athletic Time Machine blog and learn all about why you need to worry about lactate threshold in the first place.
 |
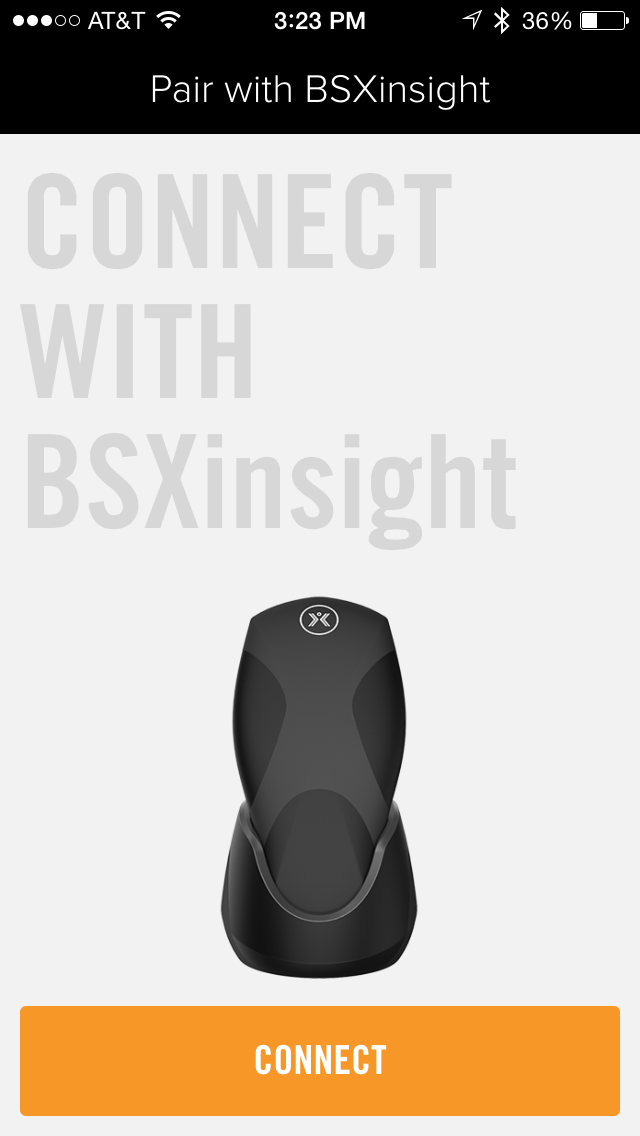
Step 1: Find the App. Once your BSX Insight is nicely charged up, I pulled it off the stand and paired it with my iPhone. To do this, I first went to the App Store and downloaded the BSX Insight app. I found it just by searching for “BSX” and it was one of several apps that came up Then, I loaded up the app and created an account. At left is a photo of the app you want to select– it’s called “BSXInsight” and it wasn’t there just two days ago on the App Store |
 |
Step 2: Pairing the App with the Module. The app then immediately prompted me to pair it with the BSX Insight module. This was easy to do and took place really quickly. Your screen should look something like the one on the left. |
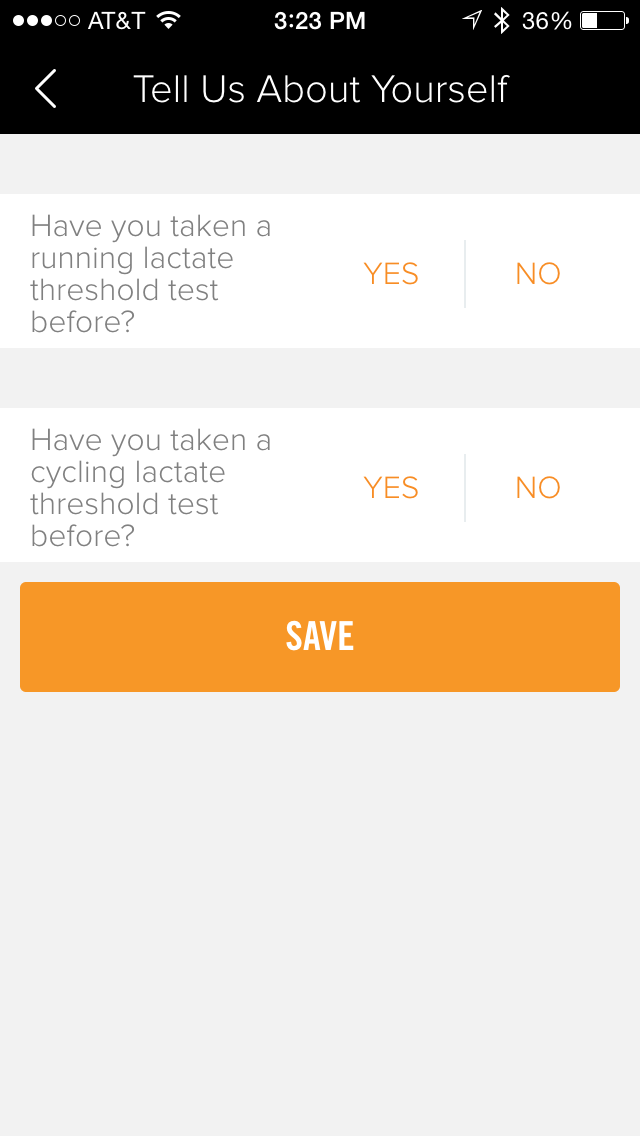 |
Step 3: Are You Experienced? Right after pairing, the app tries to get cozy with you and asks if you have ever done a lactate threshold test here. Just answer “no” to both questions if this is your first time. At left is the form you’ll get. |
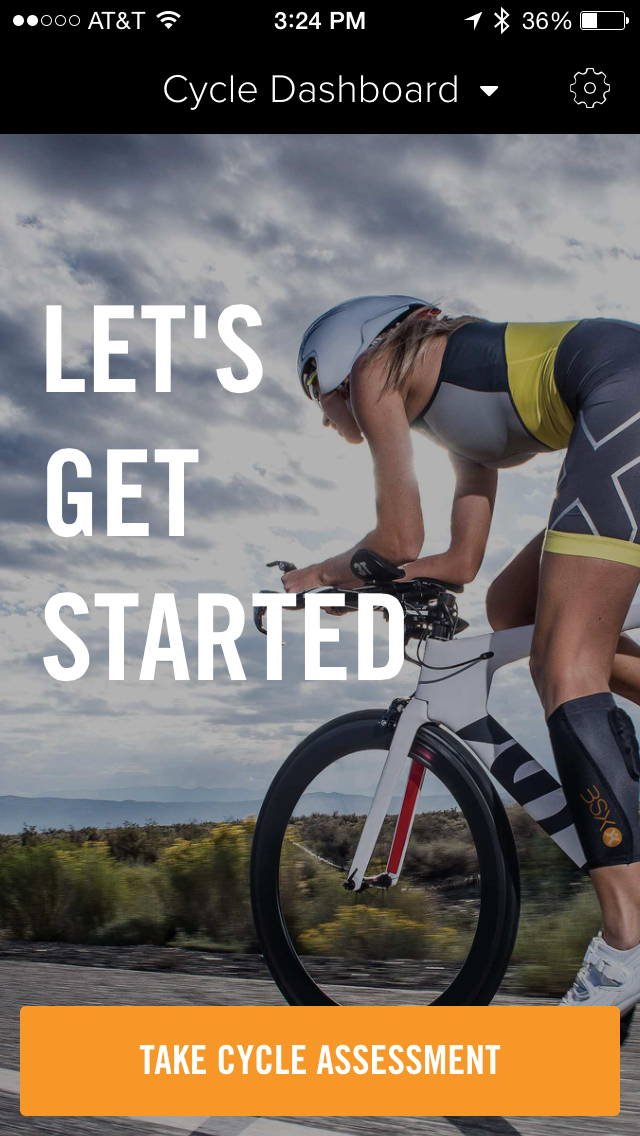 |
Step 4: Get Ready to Test. The app next presents you with a screen offering to do a cycling assessment right off the bat. A drop down menu at the top lets you choose between a running assessment and a cycling assessment. Again, here are some screenshots of the screen. |
Once you’re ready to do an assessment, you put the monitor inside the calf compression sleeve that comes with your BSX (when I say “inside,” I mean that quite literally– you have to turn the sleeve inside-out and squeeze it through the larger of the two holes near the top of the sleeve). Then, you go back to the app and decide if you are doing a running or a cycling performance. Here’s a few things you need to know:
- CYCLING. If you are doing a cycling assessment, you need to have both an ANT+ enabled heart rate monitor and power meter. You’ll also need a trainer where you can maintain a very consistent load. Ideally, you’ll want a Computrainer or other kind of computerized trainer– unless you’re really good at cycling at a specific wattage evenly over a span of three minutes at a time.
- RUNNING. If you are doing a running assessment, you need to have an ANT+ enable heart rate monitor. You’ll also want a treadmill, preferably set at a 1% grade. The reason for the 1% grade is that treadmills don’t provide any air resistance and basically “push” the belt at you– running at a 1% grade pretty much evens this out. Well, if you want to be more exacting about it, here is a online pace chart that converts treadmill paces to outdoor running paces more precisely— but, as you can see, a 1% grade on a treadmill is darn close to 0% outside.
Let’s assume you’re doing a cycling assessment. In that case, with your BSX Insight module now firmly attached to your calf, load up the app.
 |
Step 5: Preparing the Calf Sleeve. Here is the calf sleeve shown inside out. Now that you’ve charged and paired your monitor to your phone, you’ll need to slip in into the larger hole at the top of the sleeve and turn it around so the three red sensors face out through the holes. Next, you’ll turn the sleeve right side out and pull it onto your calf– the sensor should be facing inwards and placed right over the meaty portion of your gastrocnemius muscle. If the sleeve is sized properly, it should be below the fold in your knee but should stay firmly in place in your run. At left is a photo of the calf sleeve (inside out) with the holes near the top. |
 |
Step 6: Some More Questions. After pairing again with the monitor, you’re back at the screen shown in step 4. Then the next screen asks you a few preliminary questions about your current race performance and athletic background. You’ll want to be accurate as possible here, but it’s okay if you don’t know the answers exactly (for instance, if you don’t know you’re exactly 40K TT power average, just put in your last FTP measurement). The screen at the left shows what the app looks like– just tap in each field and enter the right data. |
 |
Step 7: Abandon All Hope Ye Who Enter Here. The app next will give you a sense of what you’ll be going through– basically, a ramp test starting very gently and bumping you up every three minutes until you can’t go any longer. Clicking “next” means you’re signing up for this insanity. The screenshot at left gives the gory details. |
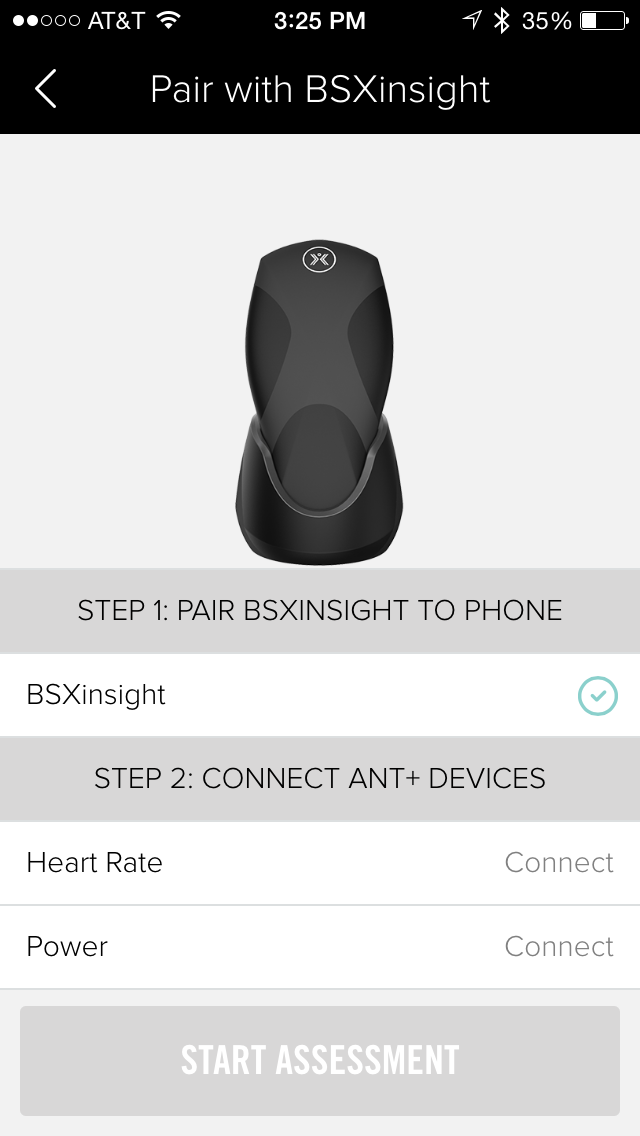 |
Step 8: Pair to Other ANT+ Sensors. You’ll next have a chance to pair your BSX Insight with the ANT+ sensors I outlined above. This is very important as it will enable the BSX to find the exact wattage level where your lactate threshold is located. At left, you can see what the screen on your iPhone looks like. When you’re ready to go, you tap “connect” next to “heart rate” and the app pairs with your ANT+ heart rate monitor. Then you tap “connect” next to “power” and it pairs with your ANT+ power meter. Obviously, this means that you don’t want to be near anyone else with an ANT+ heart rate monitor or power meter at this stage of the setup. |
 |
Step 9: Test. The next step is to click on “start assessment” and let the app guide you through a torture session. After an easy 3-minutes of riding where you say, “I’ve totally got this…,” the app gently prods you to work a little harder. Another three minutes and it gets a little harder. By the time you’ve figured out that it isn’t so easy after all, it’s time to increase the effort so more until you’re ready to die. Then you stop the test and your data gets magically sent to the cloud. Sadly, I don’t have a photo or screenshot for this part– yet. You see, along with a new BSX Insight monitor, I also managed to pick up a small chest cold. Don’t worry, it’s “small,” but I want to keep it that way– so a lung-busting lactate threshold test probably isn’t the smartest thing I could do to myself right now. Don’t worry though– I’ll update my blog with my first running and cycling lactate threshold tests as soon as I’m feeling better. |
What Else Can You Do with the BSX Insight?
Each time you use the BSX Insight, the device measures your blood oxygenation. As I blogged about very recently, blood oxygenation is very useful information. I’ve been told by the folks at BSX that, one day soon, they will have a firmware update that will allow the current model to transmit this data to your Garmin 920xt or newer Garmin watches capable of their new Connect IQ technology. In the meantime, it gets stored and uploaded each time you connect your BSX Insight device to your computer. Unfortunately, when the BSX Insight shipped and arrived last week, the program for pairing with the computer wasn’t available yet on their website (2/11 update: it’s available now). Also, it’s important to note that the BSX Insight will record relative blood oxygenation and not absolute blood oxygenation (like the $1,000 Moxy muscle oxygen monitor). While this is a bigger deal if you are a coach or need to make cross-comparisons between different athletes or different performances, it’s of lesser concern if you are just trying to get an immediate feedback on your recovery or if you are digging yourself into a hole.
Summary and Where Can I Get One?
Because of my cold, I obviously haven’t a chance to really put the BSX Insight through its paces– but what I’ve seen so far looks really good. The ability to benchmark your fitness easily every 6-8 weeks is a huge benefit for anyone serious about endurance sports– and it does it objectively and without any of the excuses of other functional tests. I’d say it’s also a lot less intimidating than an FTP or other “all out” tests because pacing isn’t an issue. For that reason, I’d say it’s certainly worth investing in.
If you’d like to get one, you can order them directly at the BSX Insight site. The BSX Insight comes in three models– sadly, the one that 90% of you will want is the most expensive model. Both the running and cycling editions are specific to their one sport; only the multisport edition has the right ANT+ channels and memory for supporting both running and cycling testing on the same device.
- XR (BSX Running Edition) $299
- XC (BSX Cycling Edition) $369
- XM (BSX Multisport Edition) $419
If you’re not in an enormous rush, however, I would recommend waiting a few days before ordering. I have been working with BSX Insight to get a pretty nice discount on these devices for AthleticTimeMachine readers in the next few days. Stay tuned for more details and come back to see how testing goes when I feel better (Update: Use the code “TIMEMACHINE” and get a 10% discount now! The Athletic Time Machine is now part of BSX Insight’s Ambassador Program)
Thanks for reading and be sure to like the Athletic Time Machine Facebook page and follow us on Twitter @AthTimeMachine. If you found this post useful, please reblog it on WordPress, share it on Facebook, or retweet it on Twitter to share it with your friends.

Reblogged this on @XLrunner and commented:
A great review of the BSX insight.
LikeLike
a question: can not configure the steps? (i mean the 3min to 2min or the +20w to +50w)
greetings from http://blog.zitasport.com/
LikeLike
No, the steps are fixed at 3:00 because their algorithm depends on that model for calculating lactate threshold. I think from taking similar tests in the past that you need to “stabilize” at a pace/effort for awhile for your body and muscles to give a true lactate reading for that effort. The body’s built-in lag time also is the reason why the test can’t be a continuous smooth ramp.
LikeLike
Thanks!
LikeLike